How to Reconcile Bank Accounts within Clearing
Learn how to reconcile Short-Term Rental bank accounts effortlessly within Clearing. Streamline your financial management and enhance accuracy.
January 5, 2024
Michelle
.png)
Property managers often find themselves wrestling with the challenges of reconciling bank accounts, ensuring that the figures on their bank statements align seamlessly with their financial records. This task is especially critical for those handling Short-Term Rental business bank accounts and vacation rental business bank accounts. The time-consuming nature and risk of discrepancies in the reconciliation process make it a daunting aspect of day-to-day operations. In light of these challenges, Clearing offers a powerful solution by providing a platform that simplifies the process of bank reconciliation, making it more efficient and precise.
Clearing, a leading platform in rental property financial management, has introduced a groundbreaking solution with the feature release of Reconciliations, specifically designed for property managers handling vacation rental business bank accounts and engaged in vacation rental trust accounting. This innovative feature transforms the arduous task of bank reconciliation into a seamless and efficient process. By providing a user-friendly interface, Clearing ensures precision in reconciling bank statements and enhancing overall accuracy and reliability in financial management.
Simple Steps to Reconcile Bank Accounts within Clearing
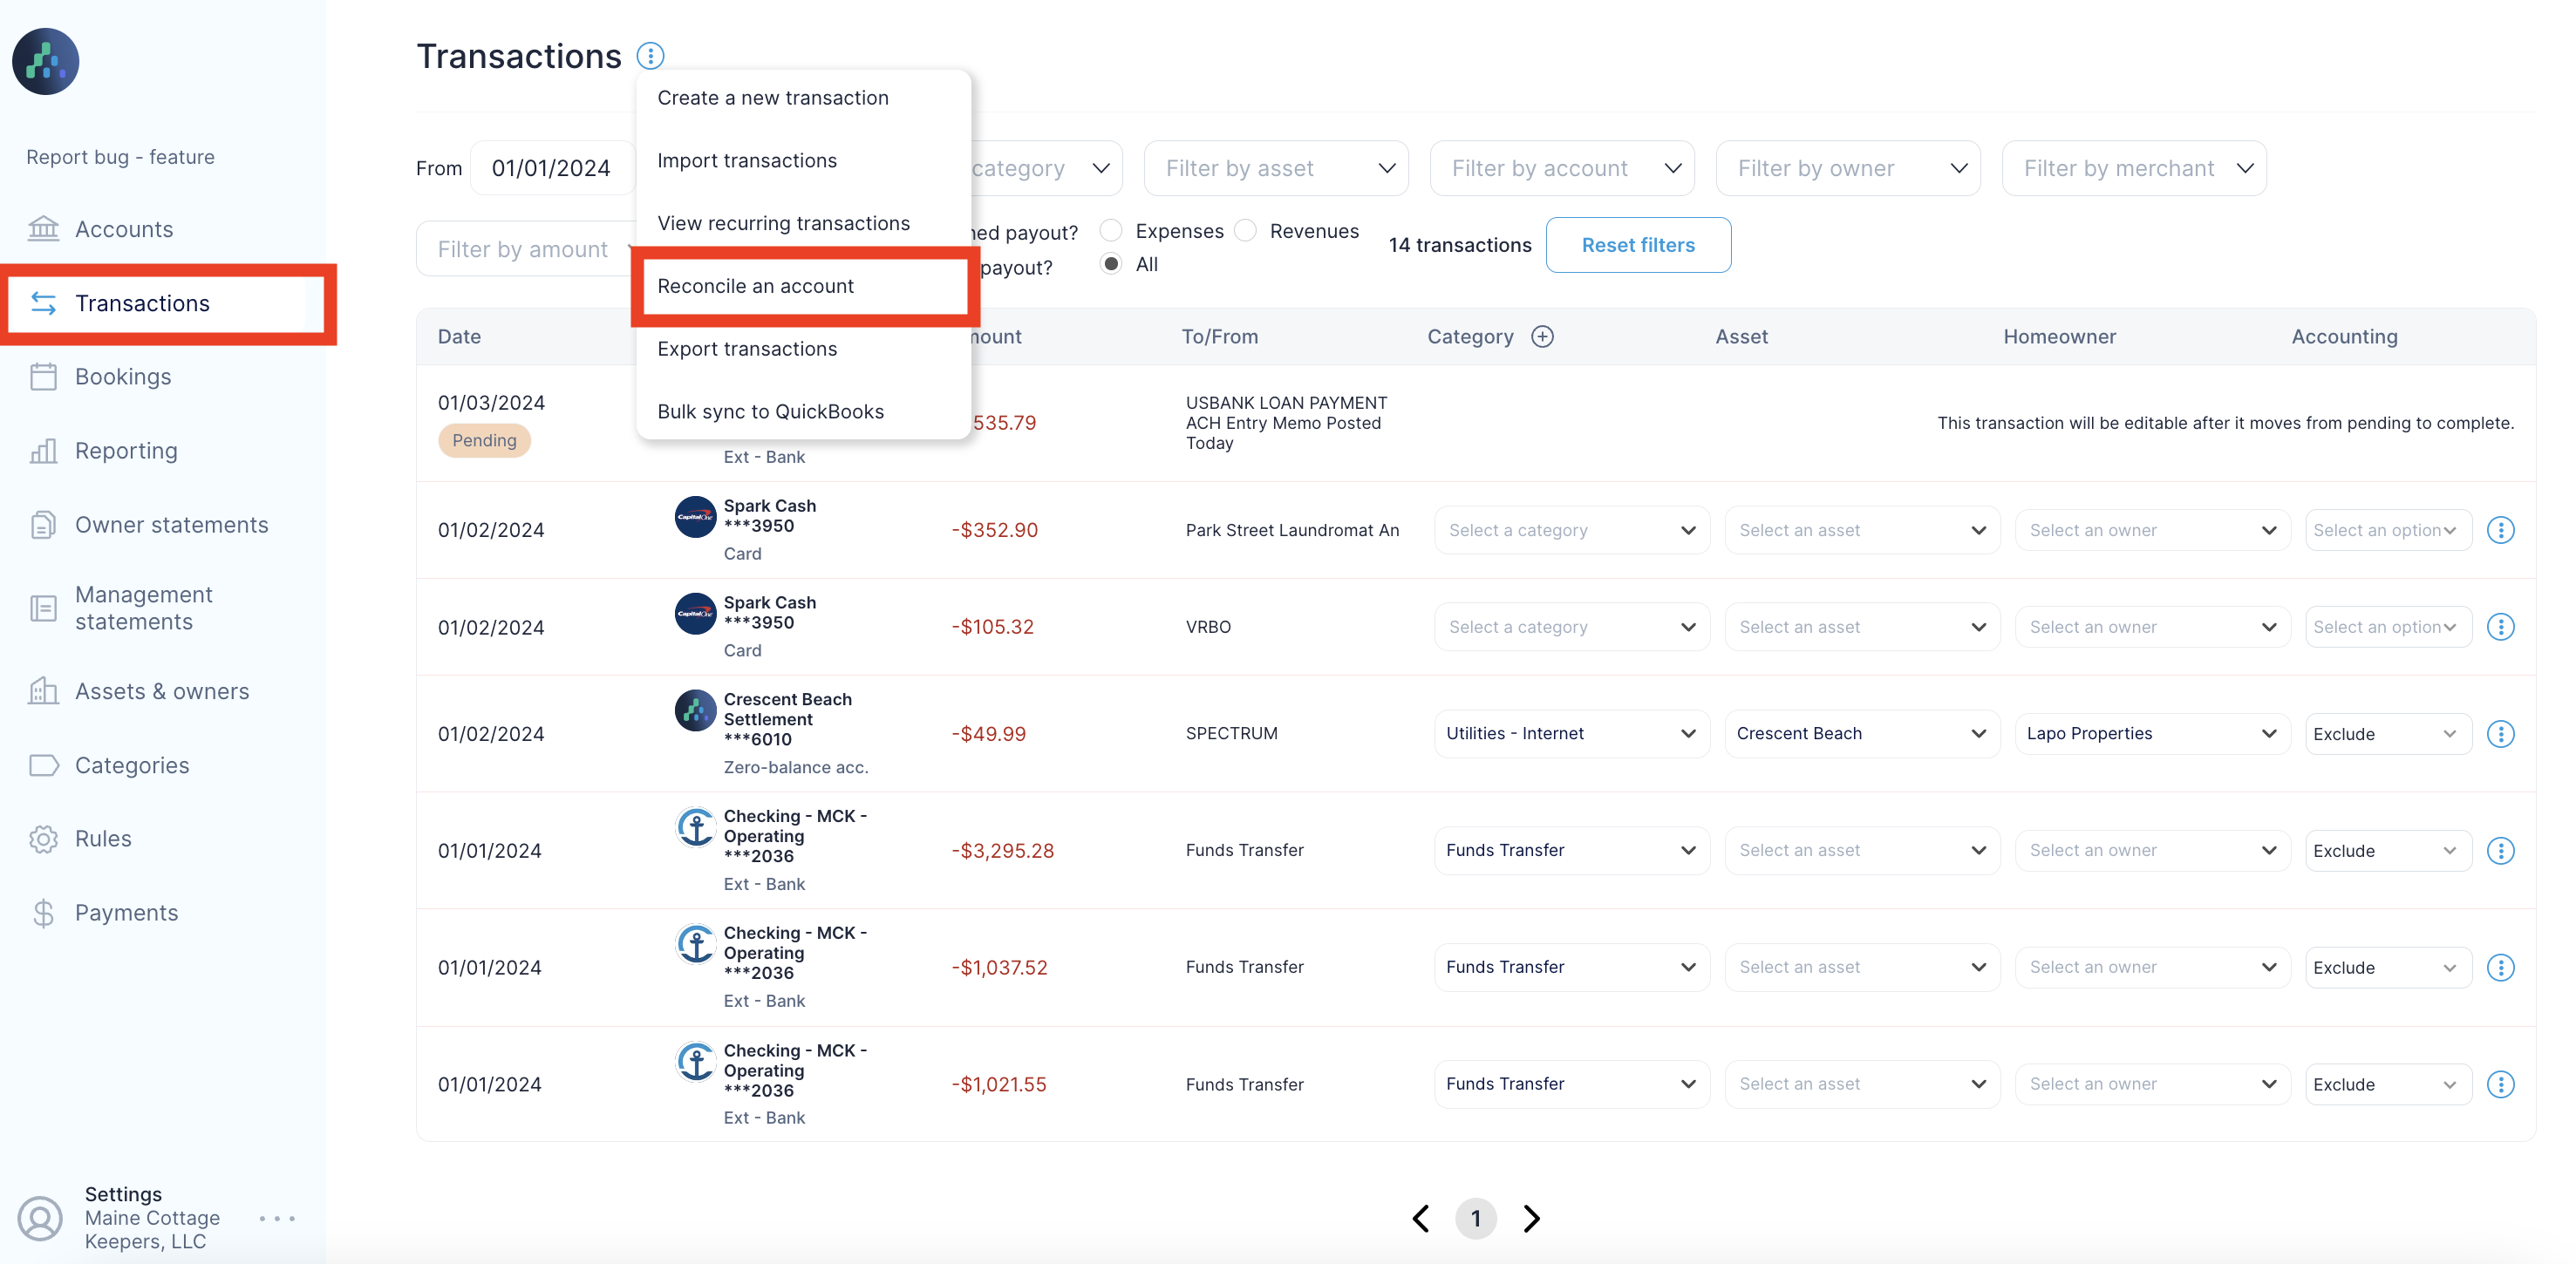
Step 1 - Access the Reconcile Account feature in Clearing
Log in to your Clearing account using your credentials and navigate to the “Transactions” section in the side menu. Within the "Transactions" section click on the “3 dots sign” beside the “Transactions” title, it will show you a drop-down menu. Here locate and click on the "Reconcile an Account" feature to initiate the reconciliation process.
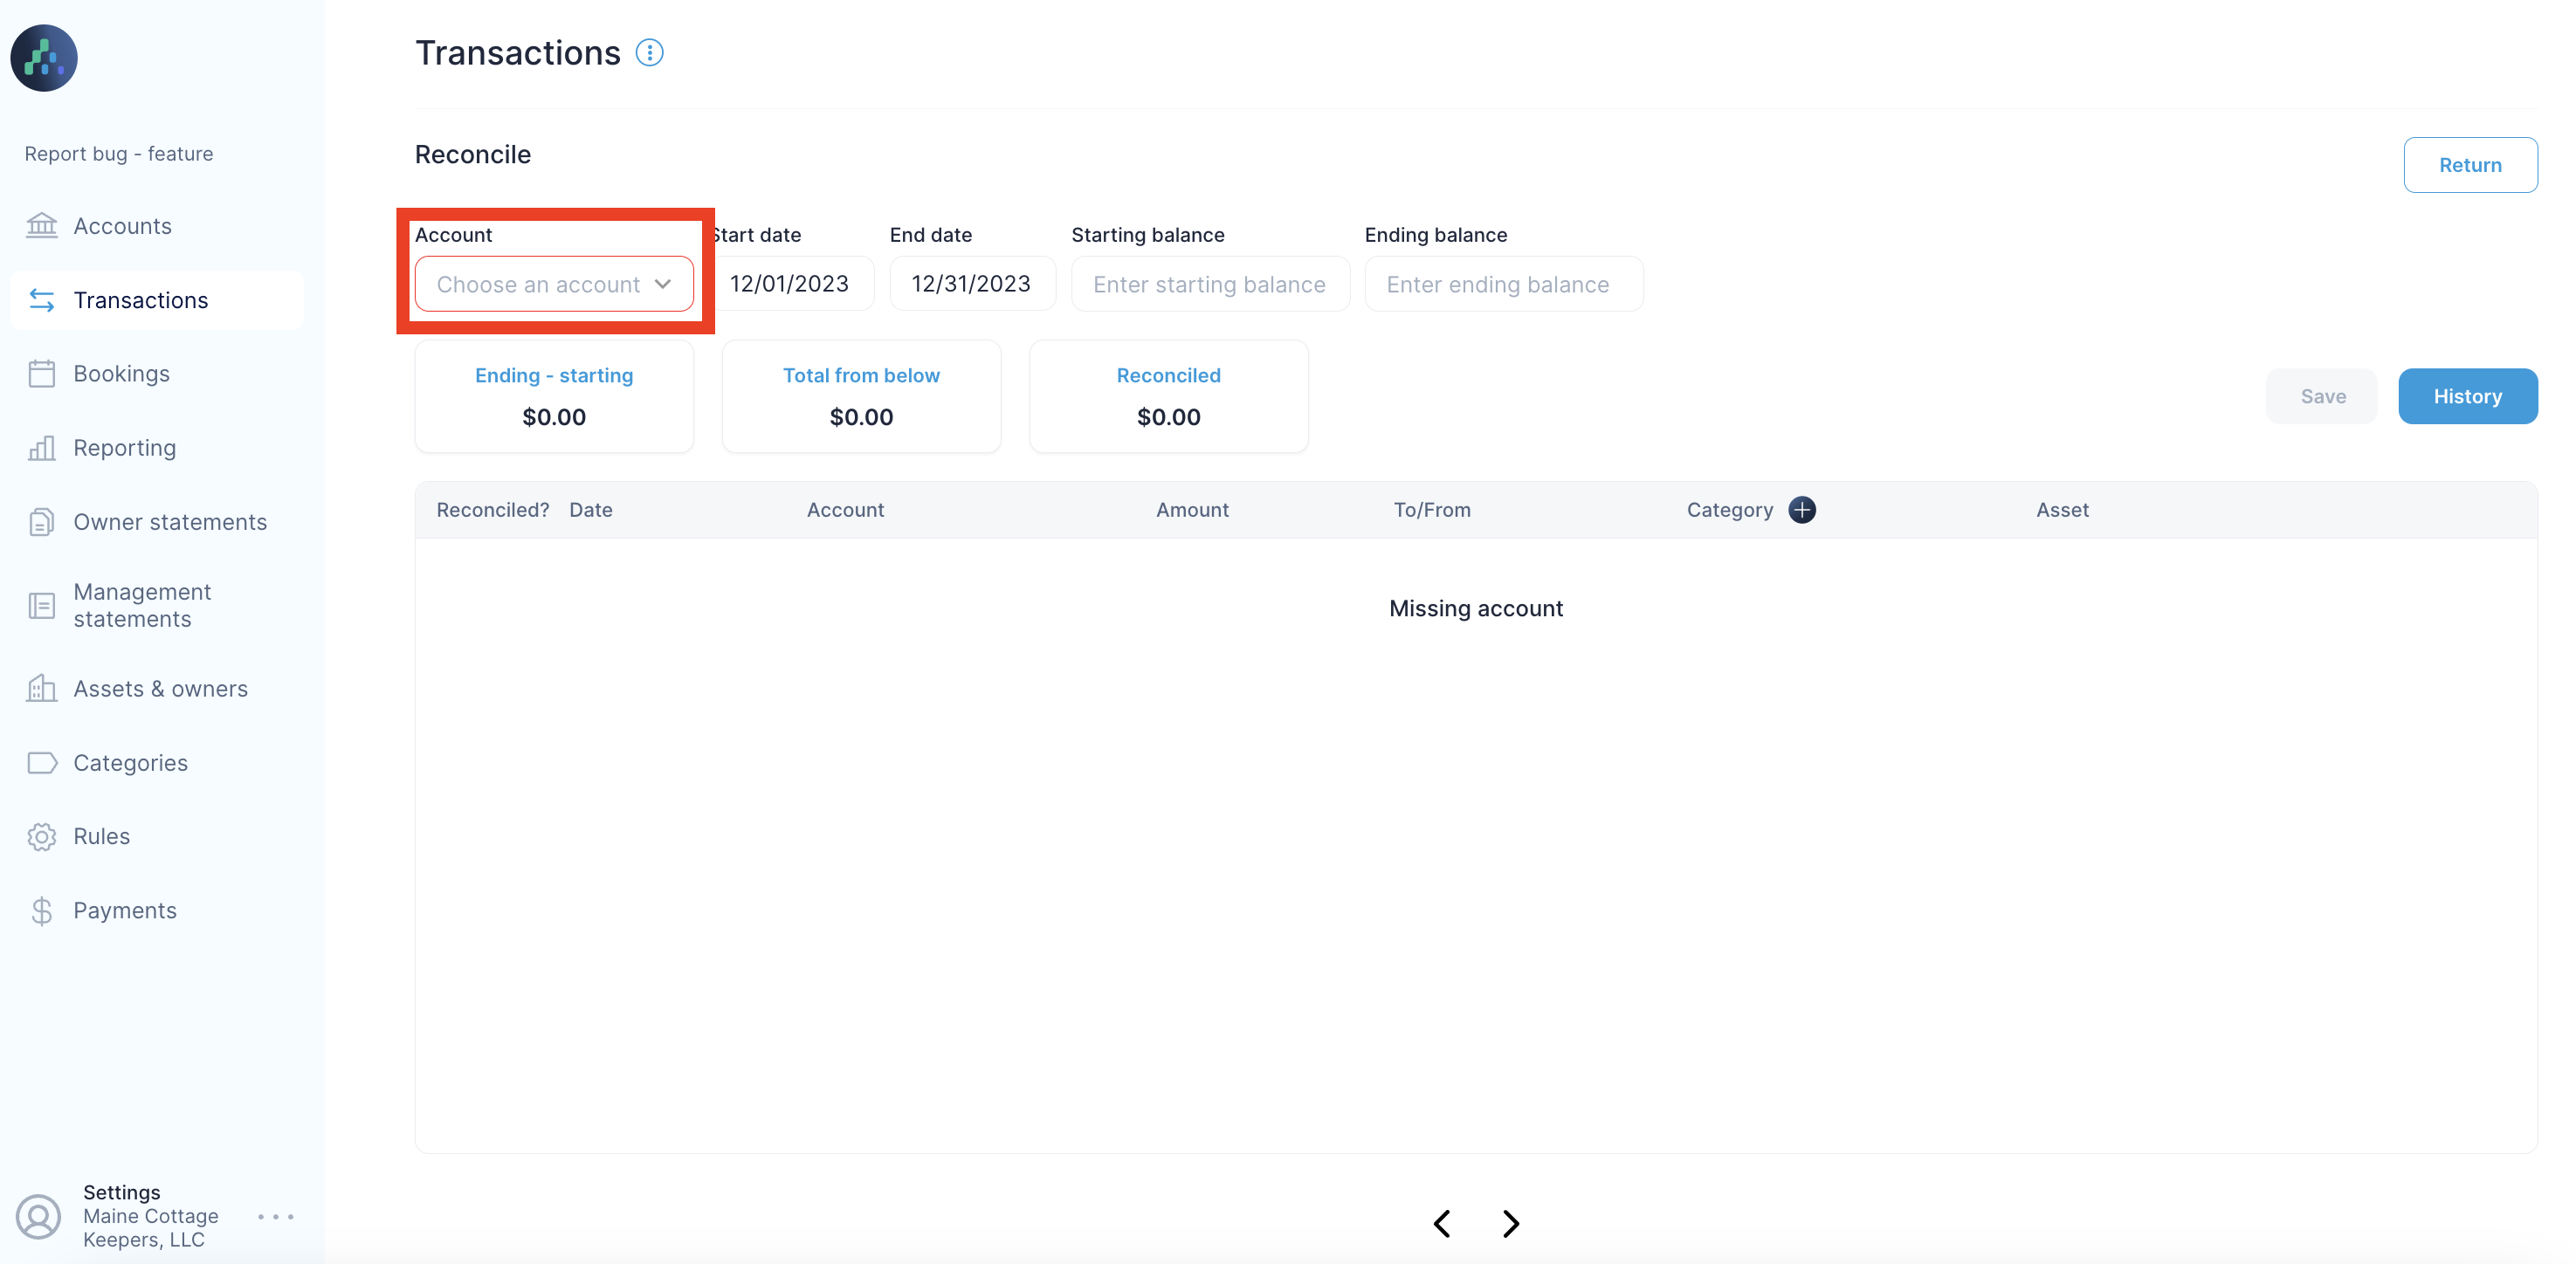
Step 2 - Choose the Specific Bank Account
Select the bank account you wish to reconcile. This flexibility is crucial for property managers handling multiple bank accounts for Short-Term Rental businesses. Any bank accounts or balances attached to our software will appear in this list.
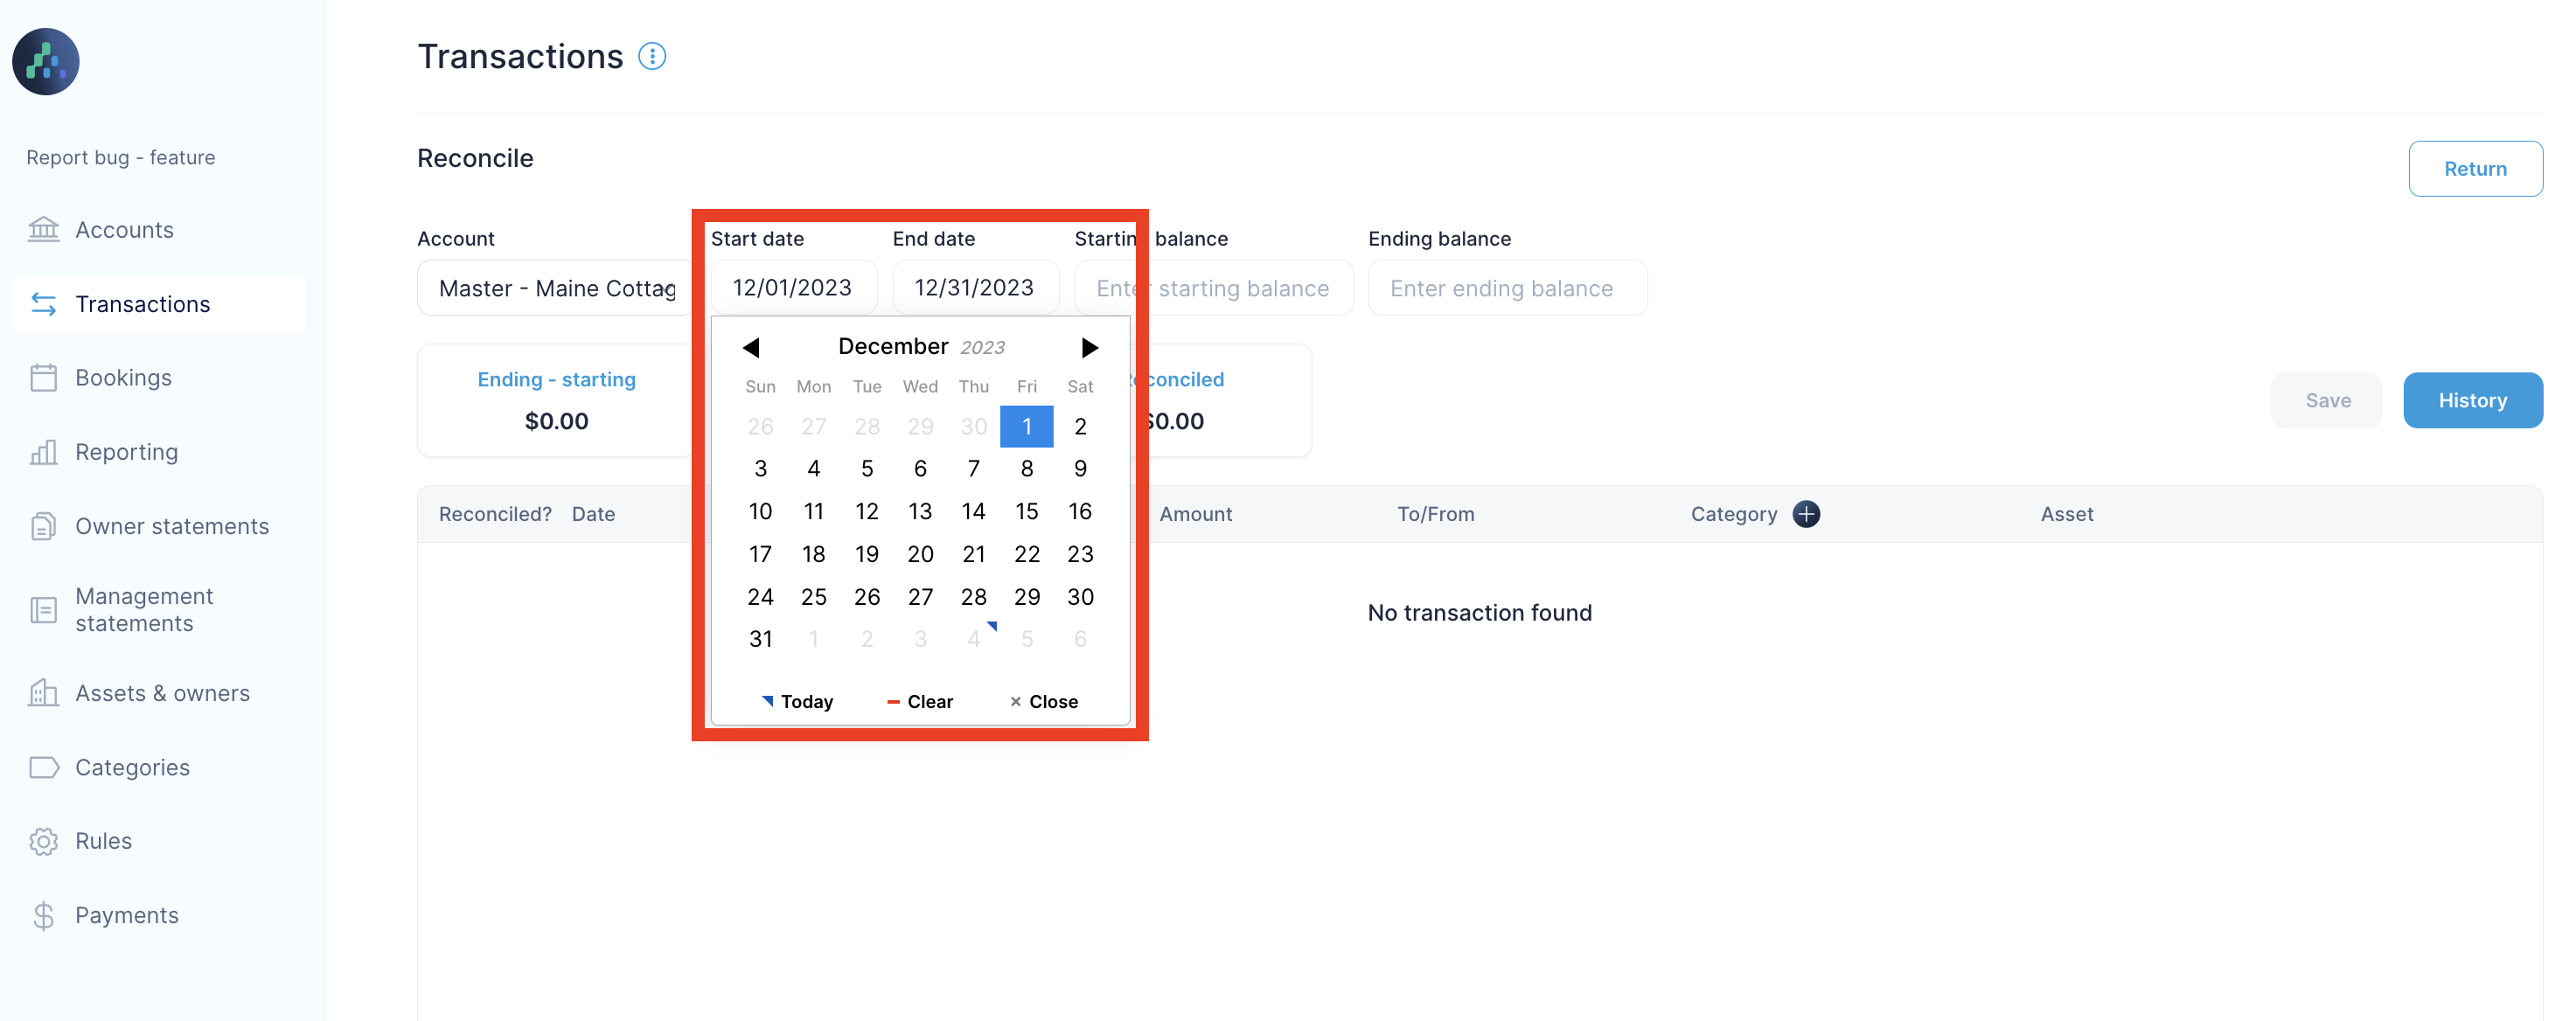
Step 3 – Set the Date Range
Choose a date range for the reconciliation process. This will typically be based on the statement you're working on at the time. It should include the same start and end date.
Step 4 – Put Starting and Ending Balances
Clearing provides a clear visual representation of the starting and ending balances. You can put the starting and ending balances in relevant boxes according to the bank statement you are referencing.

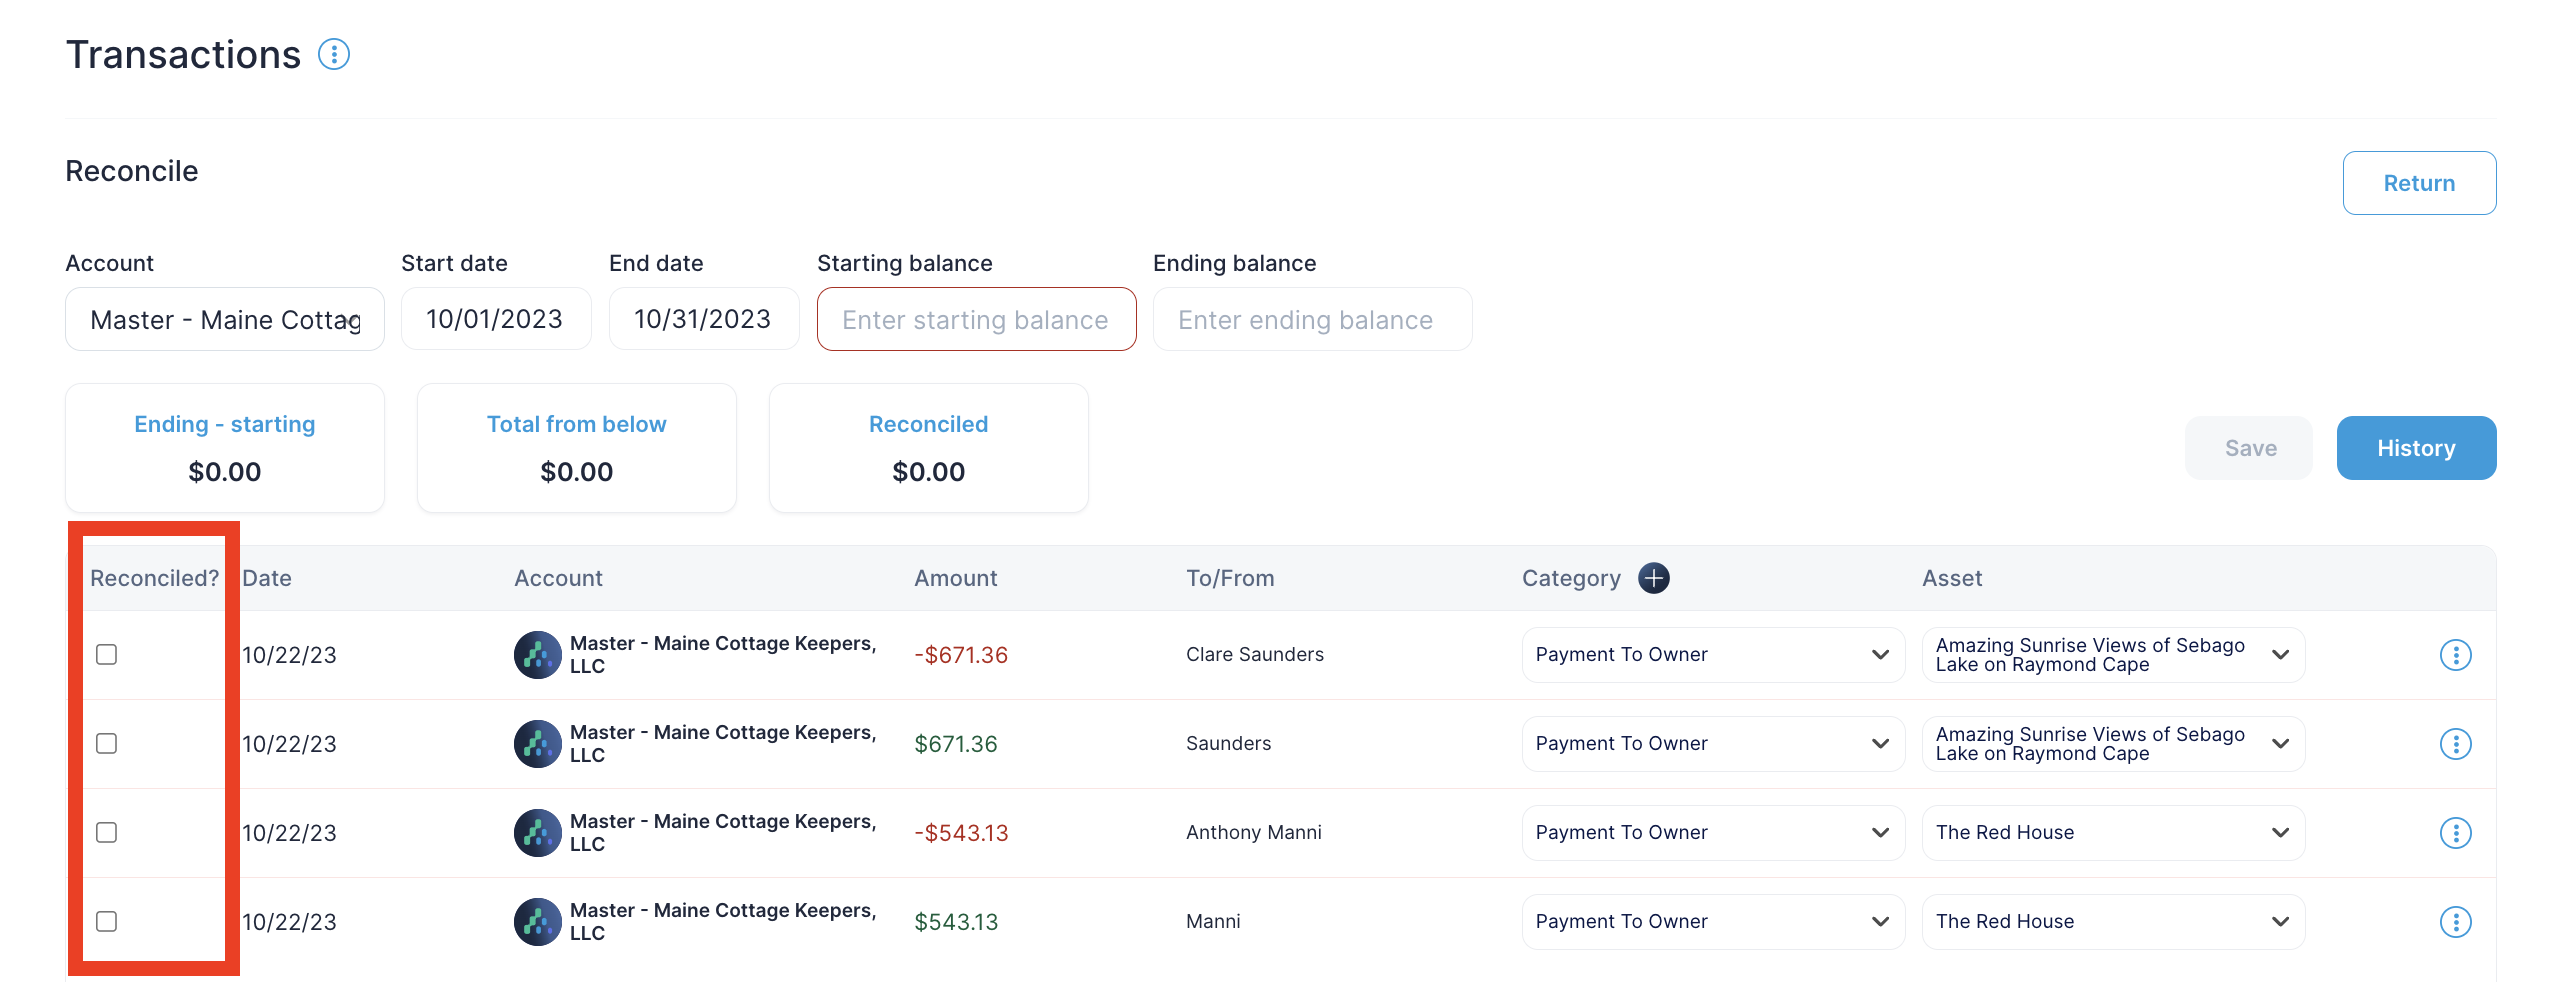
Step 5 – Reconcile the Transactions
Go through each transaction, after confirming and categorizing them appropriately, click on the check box against each transaction to add each transaction to the reconciled amount.
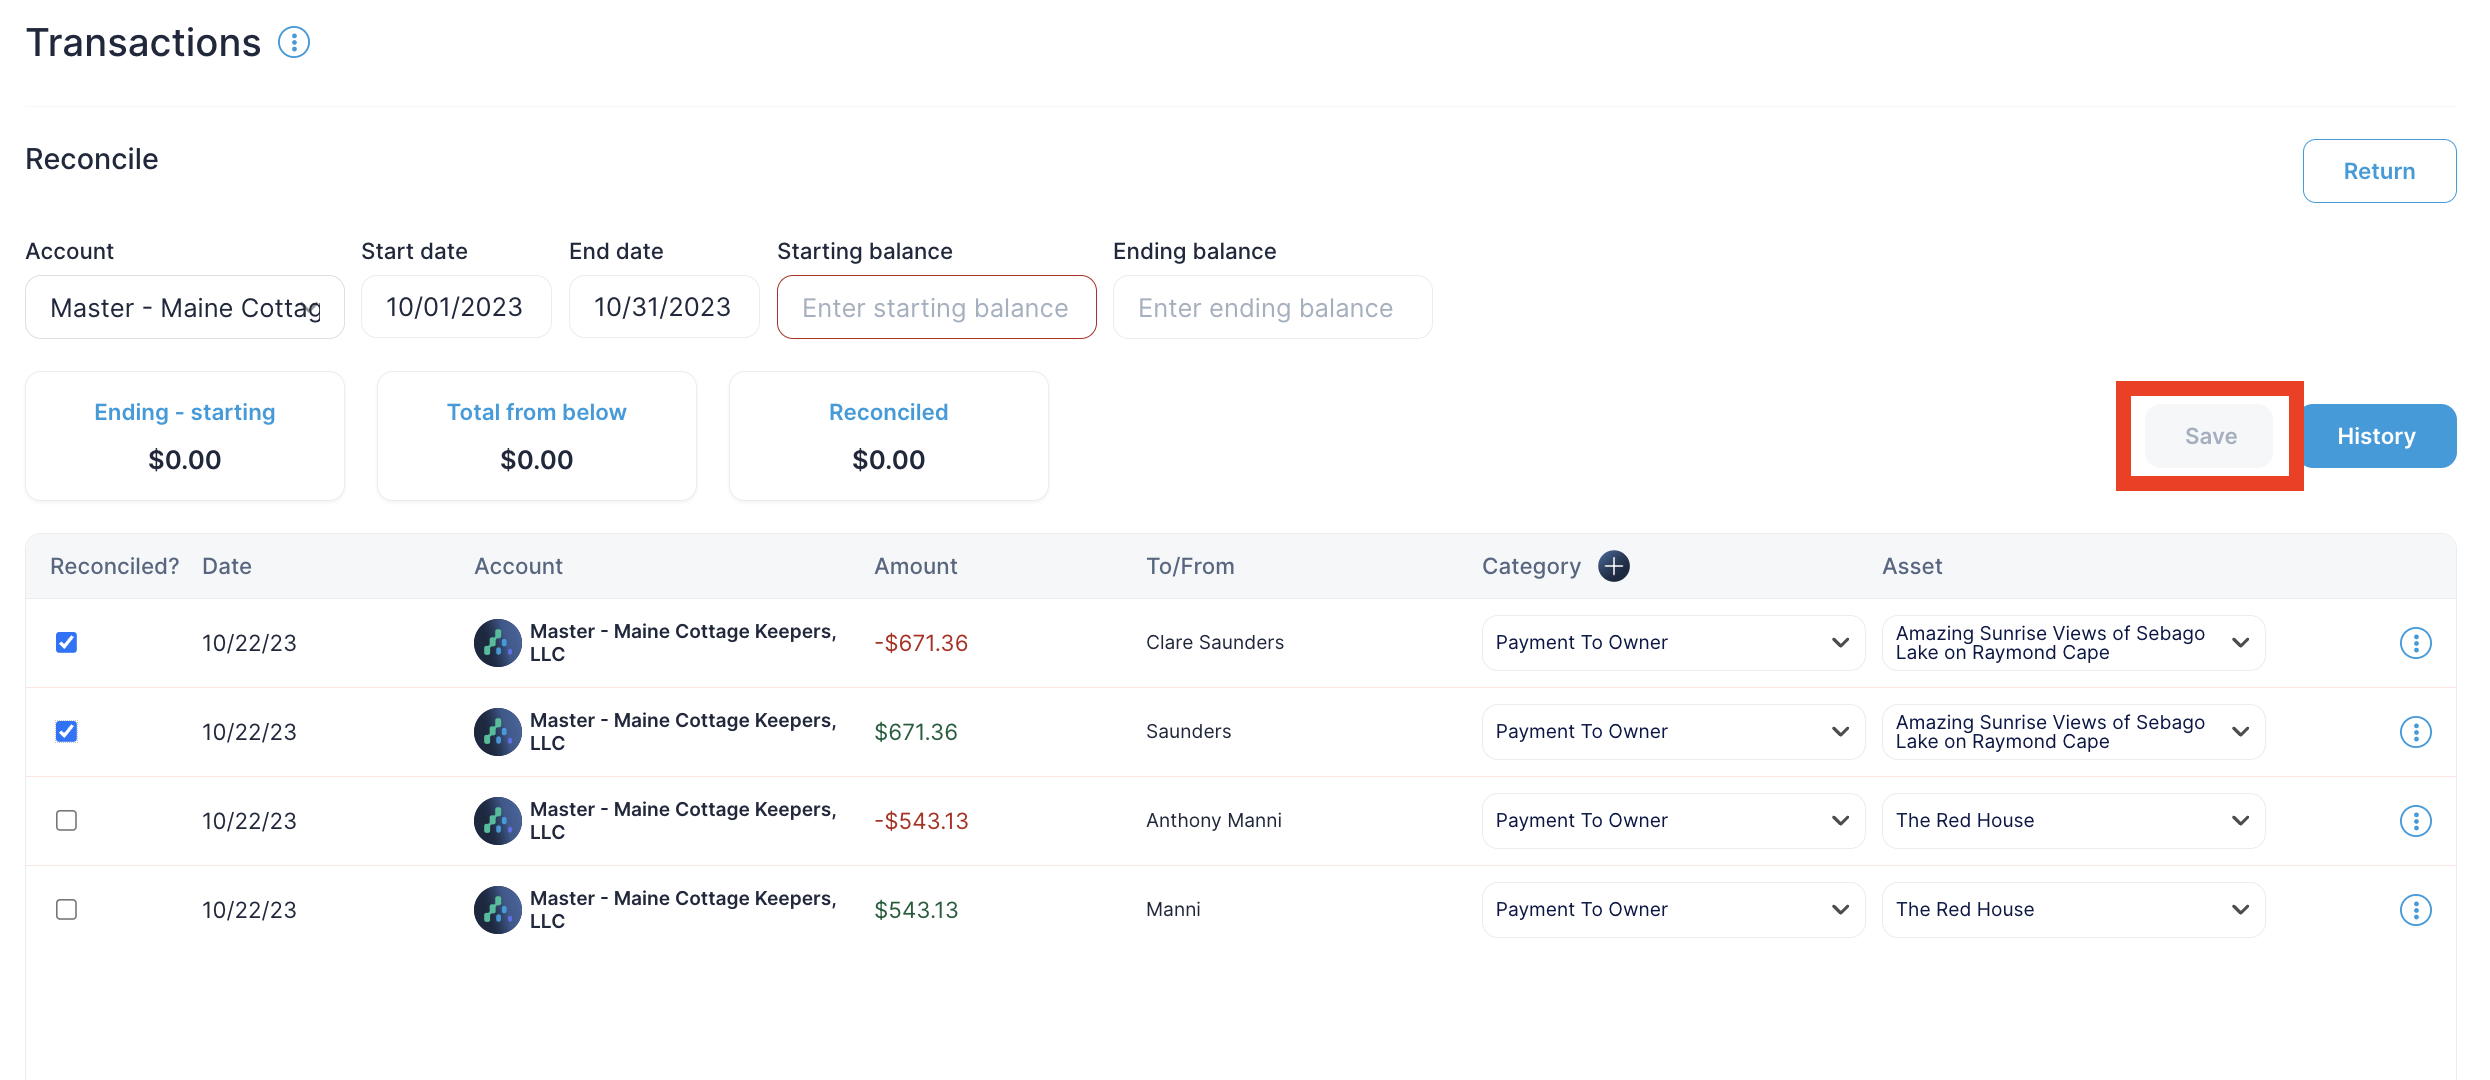
Step 6- Save Reconciliation
Once all transactions are reconciled, click on the "Save" button. This action saves the reconciliation for future reference.
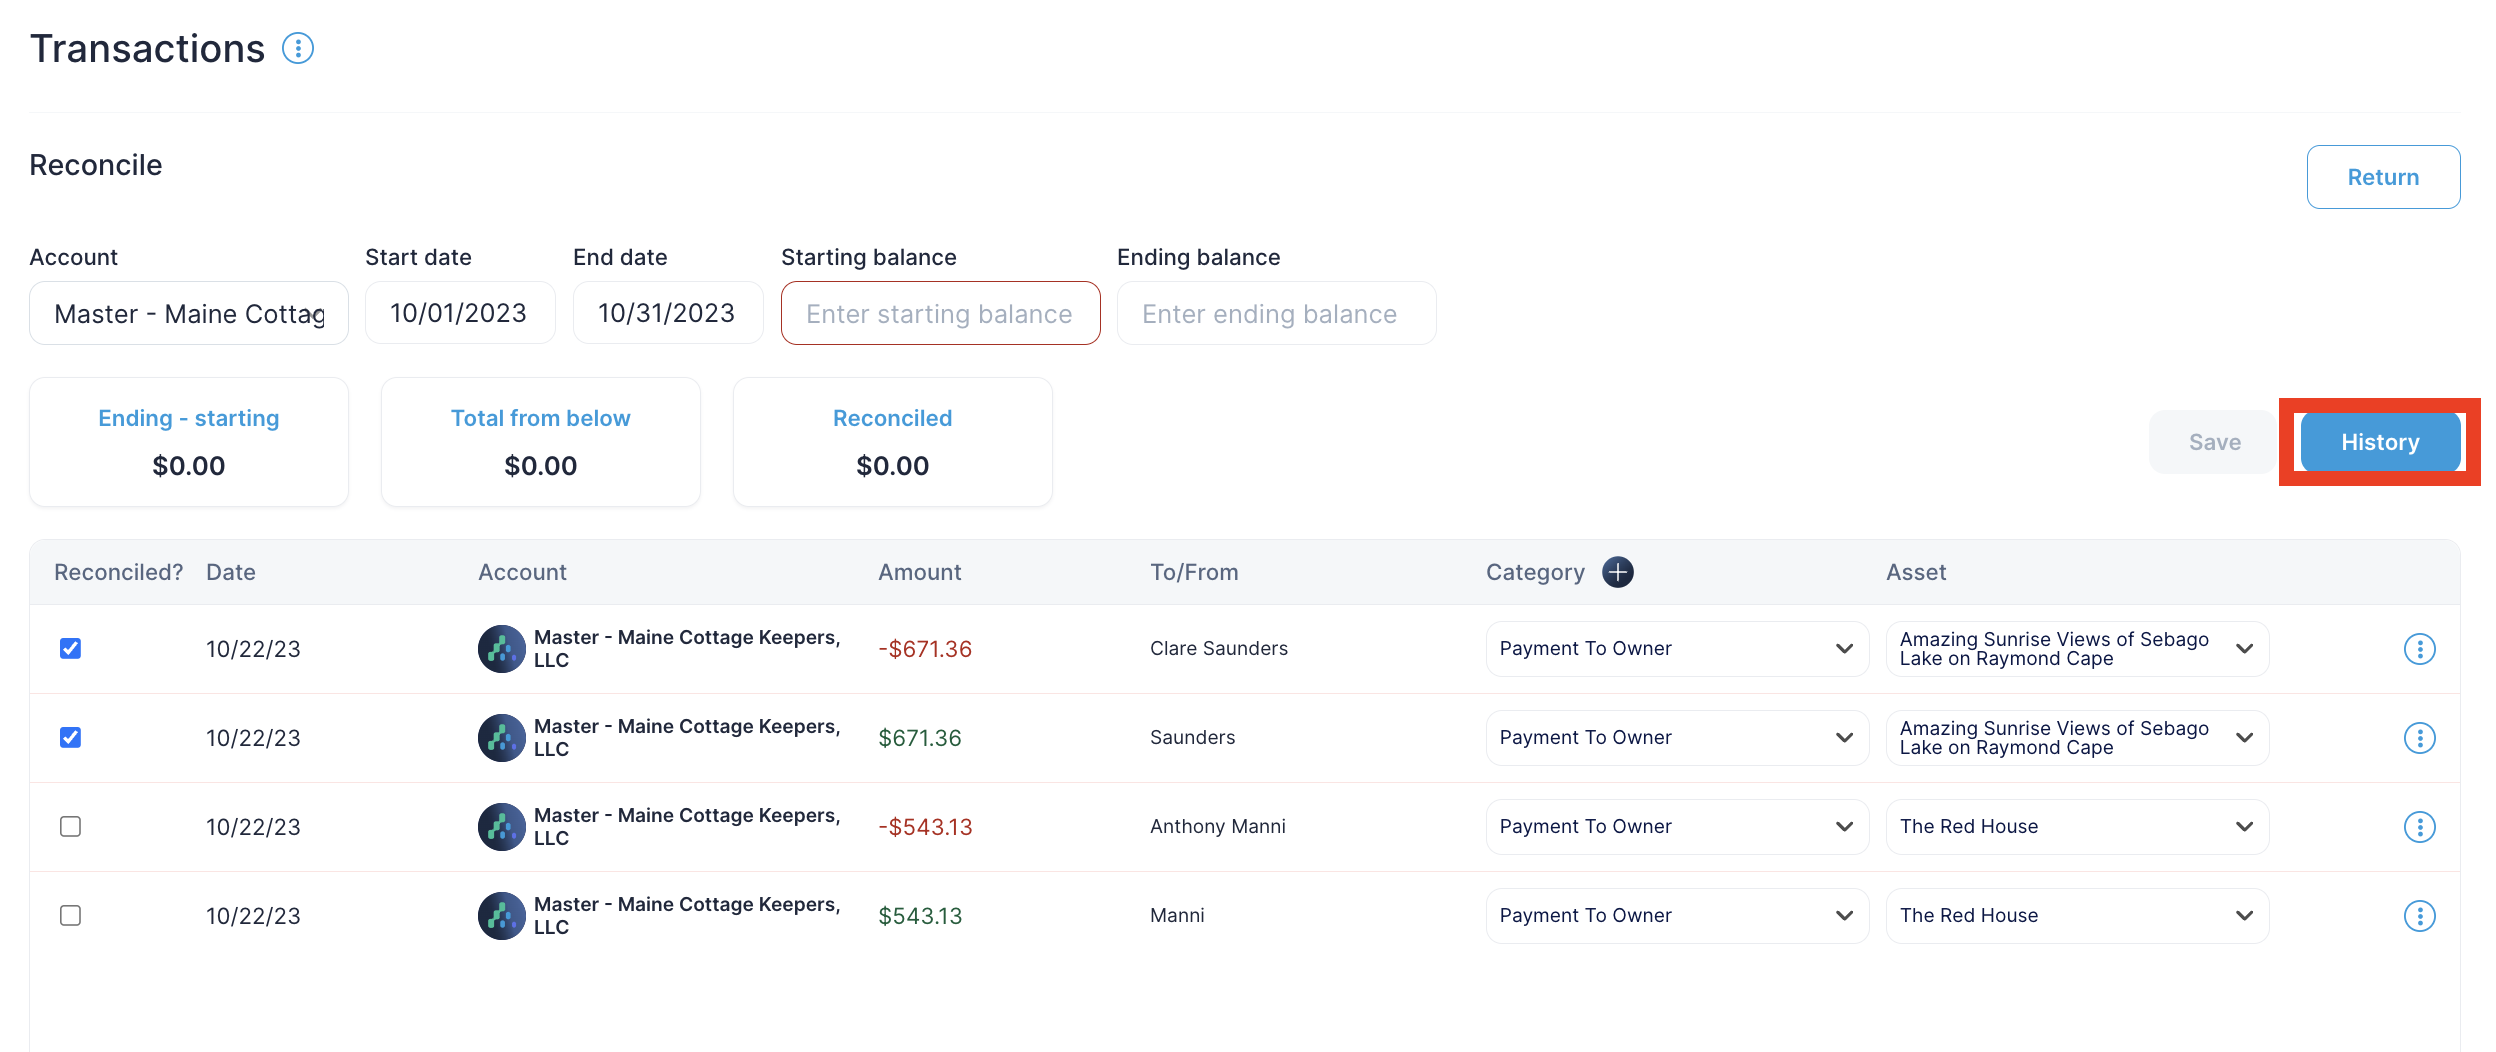
Step 7- Access Historical Data
Property managers can save and store multiple reconciliations, contributing to a comprehensive financial history. Click the "History" button to view and revisit previous reconciliations for transparency and traceability.
Embrace the efficiency and precision of our groundbreaking feature - Reconciliation - and discover the joy of seamless bank reconciliation, saving time and ensuring accuracy in your financial records.
Ready to revolutionize your bank reconciliation process?
Request a personalized demo now and learn how to reconcile bank accounts within Clearing to elevate your reconciliation experience.
Visit our comprehensive knowledge base today to dive deep into Clearing's features and embark on a journey to revolutionize your expense management experience. To stay up to date on our other feature releases, be sure to check out our product updates.
Clearing is a Financial Technology Company, not a bank.

.png)
.png)
%20(1).png)
.png)
.png)
.png)
%20(1).png)
%20(1).png)
%20(1).png)


.jpg)
%20(1).png)
%20(1).png)
%20(2).png)
%20(1).png)

%20(1).png)
%20(1).png)
%20(1).png)


%20(1).png)
%20(1).png)
%20(1).png)
%20(1).png)
%20(1).png)


%20(1).png)
%20(1).png)
%20(1).png)
%20(2).png)
%20(2).png)


%20(2).png)


%20(2).png)
%20(1).png)
.png)


%20(2).png)
%20(2).png)

.jpg)
.png)
.png)
.png)


.png)

.png)
%20(1).png)
.png)

.png)

.png)
.png)
.png)
.png)
.png)


.png)
.png)
.png)
%20(1).png)
%20(1).png)
%20(1).png)
%20(1).png)
%20(1).png)
.png)
.png)
.png)
.png)
%20(1).png)
.png)
.png)
.png)
.png)
%20(1).png)
.png)

.png)