
How to Create Custom Tags for Efficient Transaction Management in Clearing
Learn how to efficiently categorize and arrange property management transactions using custom tags in Clearing. Streamline your workflow, retrieve transactions quickly, and make transaction management more comfortable.
August 18, 2023
Michelle
.png)
Property managers handle hundreds of transactions every month. Efficiently categorizing and organizing them is essential for accurate bookkeeping. Clearing recognized this challenge and now offers a solution for implementing custom tags to streamline your bookkeeping and trust accounting. Property managers can add specific characterizations to each transaction using custom tags, which enables fast retrieval through tag-based filtering. Custom tags come in addition to the set of pre-populated standard tags for property managers offered in your Clearing account.
Clearing's custom tags feature offers property managers exceptional customization and organization. Users can create specialized categorization systems with custom tags that match their specific requirements. Using tags, property managers can easily organize transactions, assign multiple tags to a single transaction, and retrieve relevant information conveniently. Being able to create unlimited tags, and tag groups, ensures a highly customizable experience for your accountant or bookkeeper.
Property managers can use custom tags in Clearing to achieve unrivaled efficiency and elegance in transaction management, bookkeeping operations, and ultimately, trust accounting.
Simple Steps to Create Custom Tags in Clearing
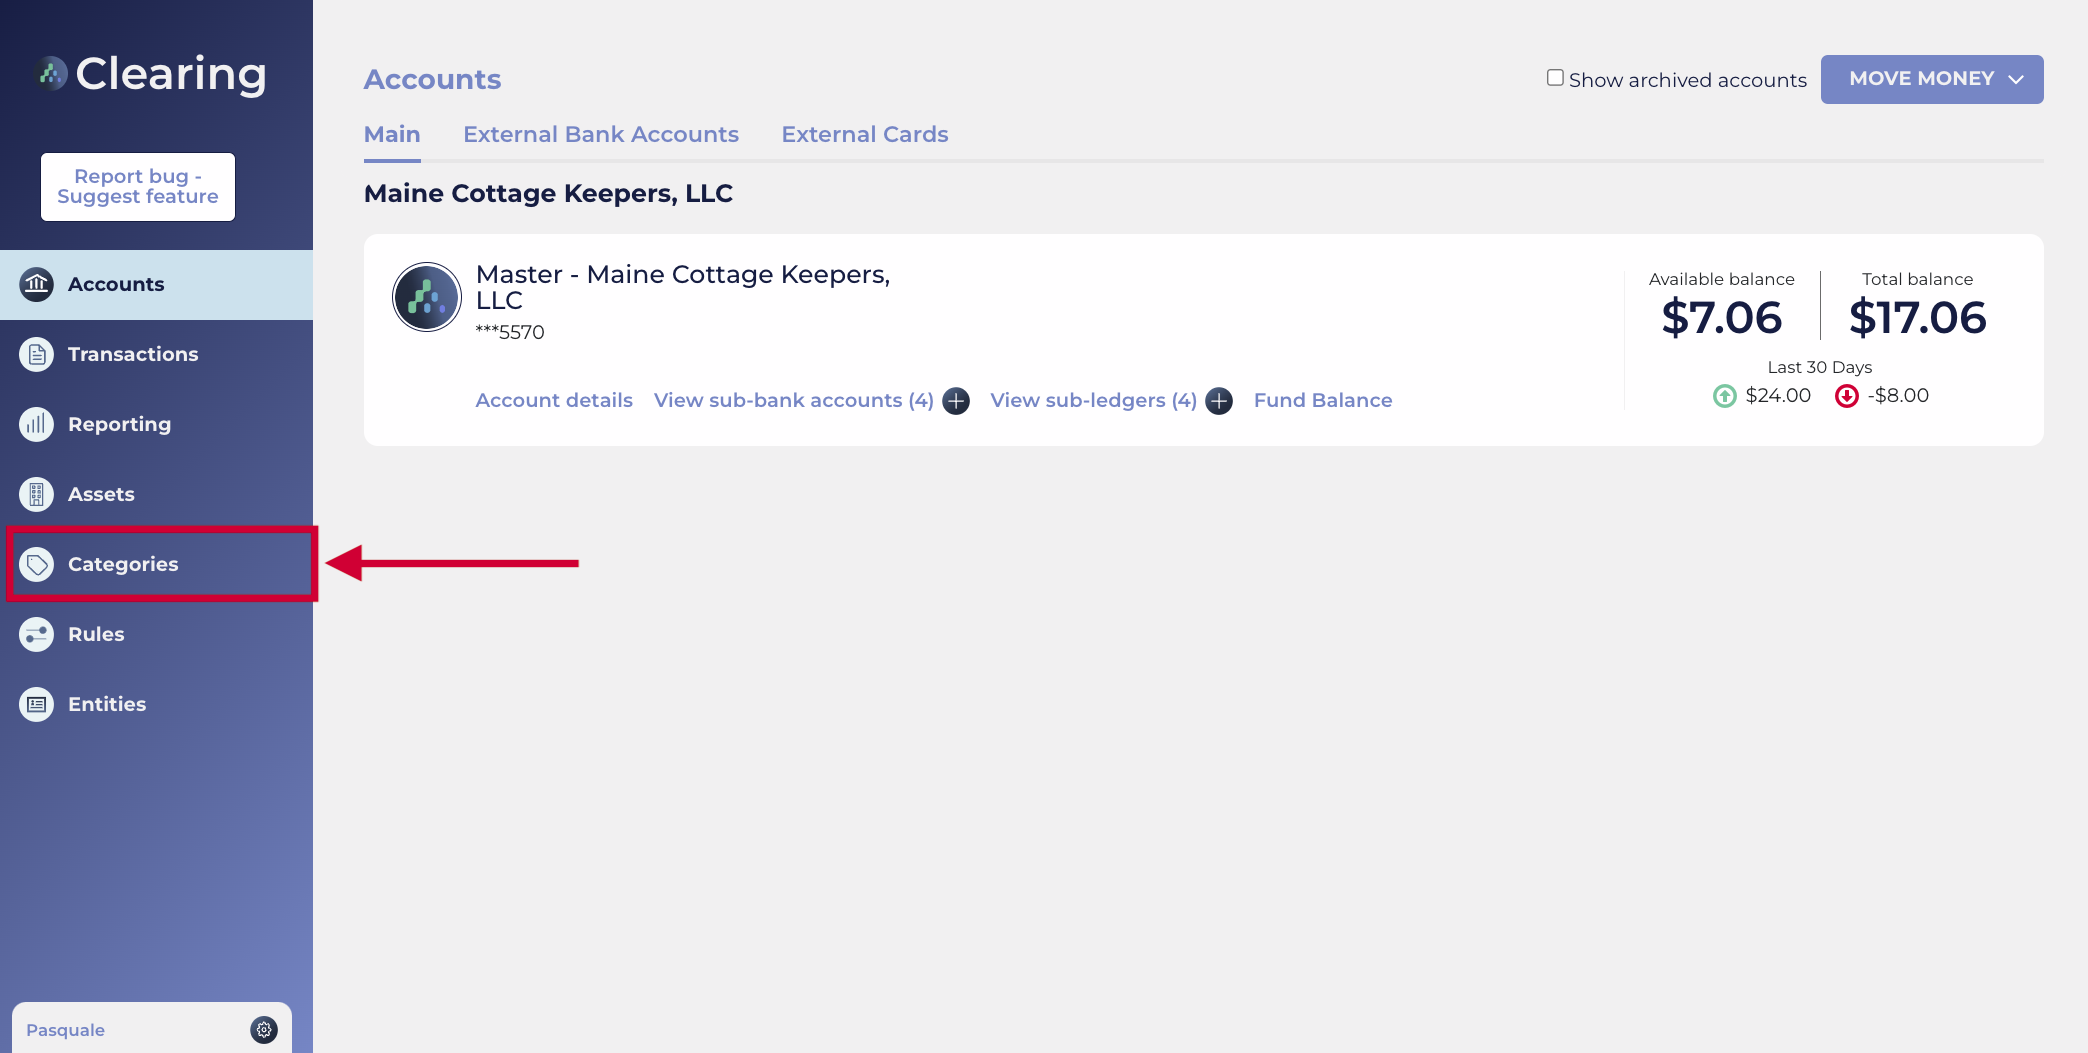
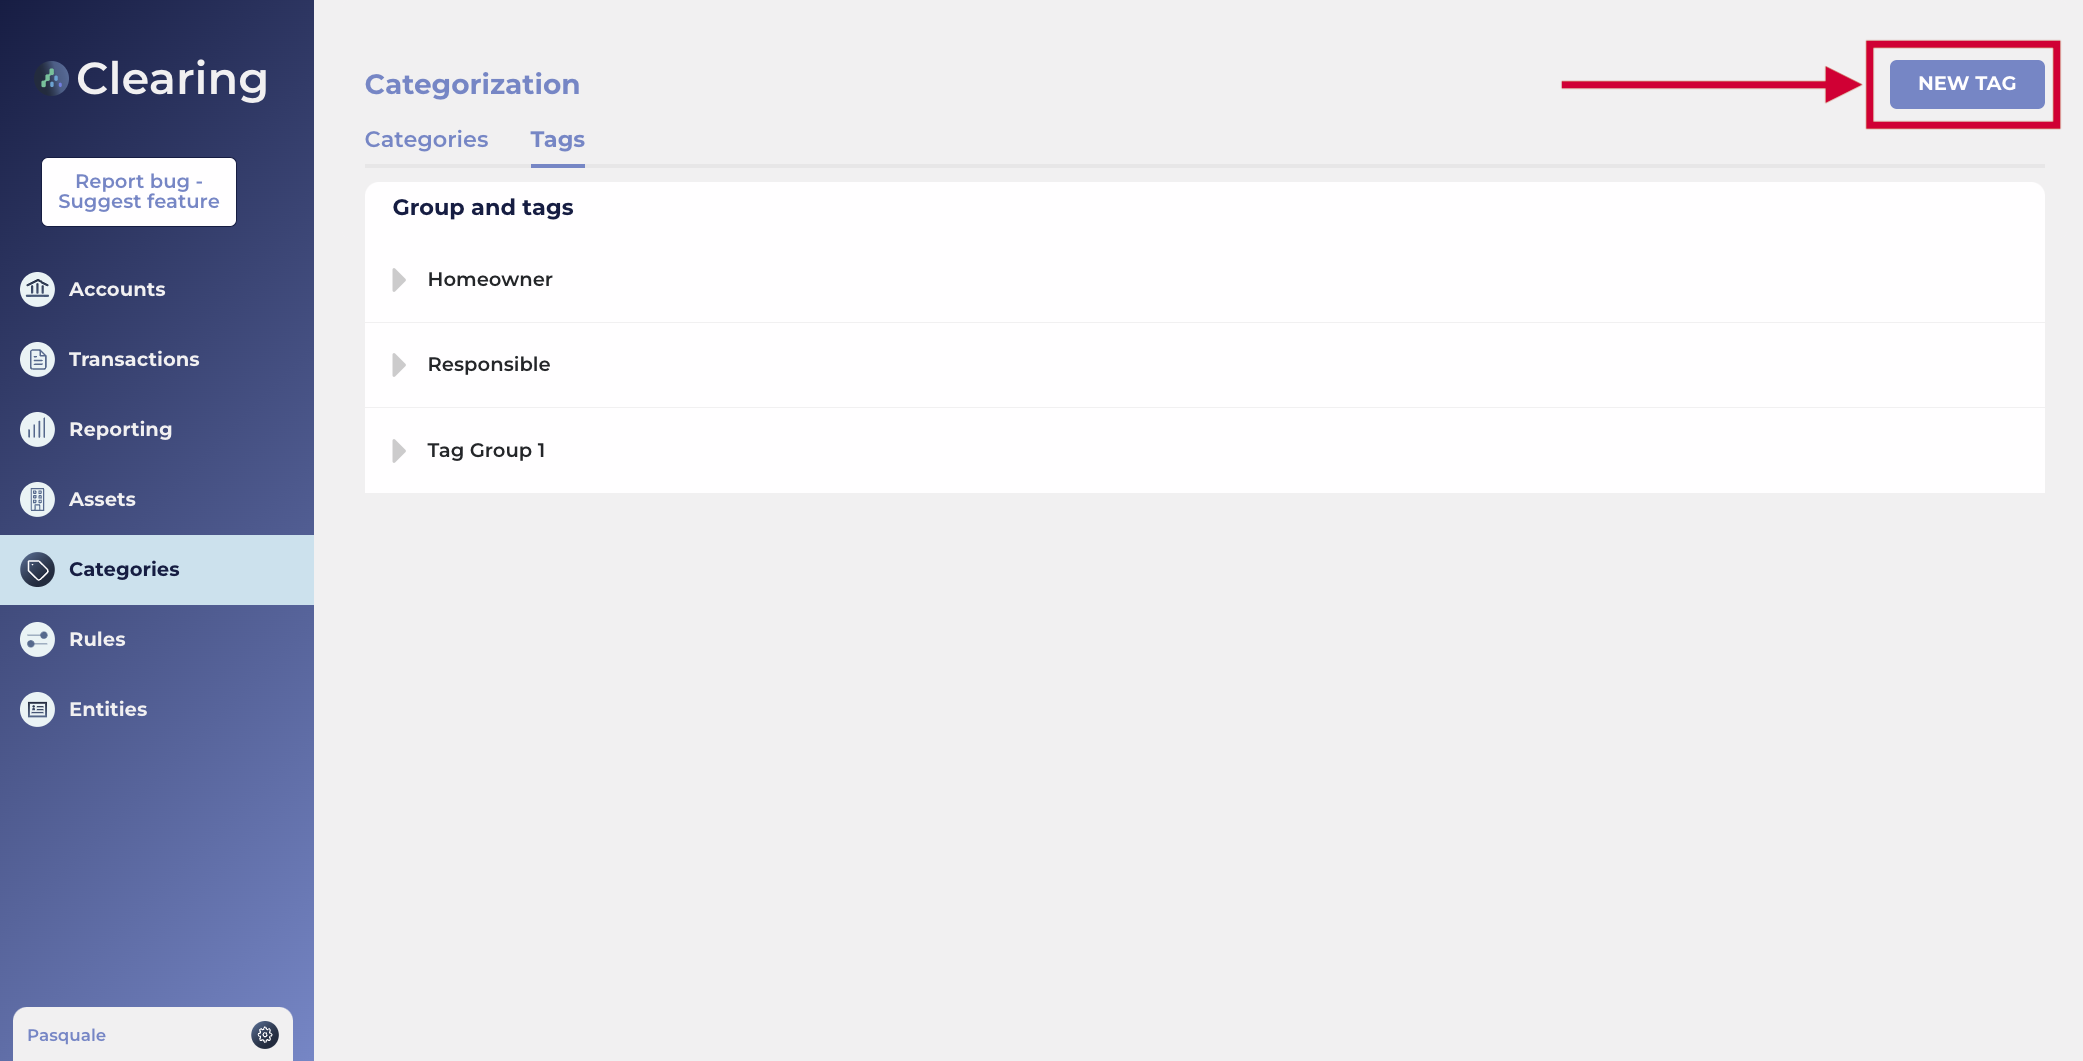
Step 1: Access the Tags Section
Log in to your Clearing account and navigate to the "Categories" section. Click on "Tags" to access the tag management interface.
Step 2: Create a New Tag
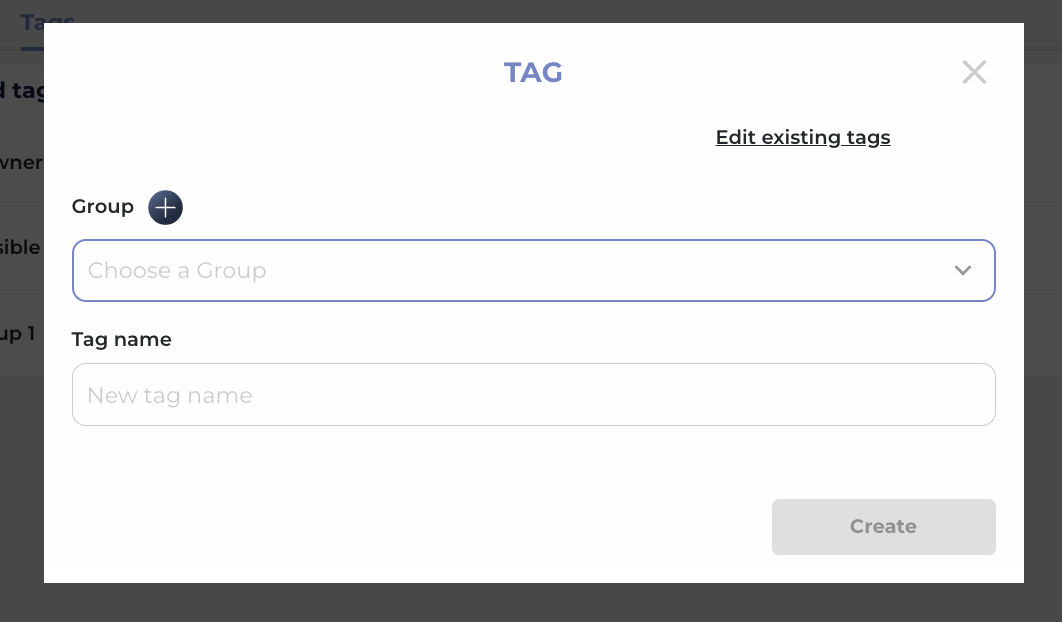
Click "New Tag" within the tag management interface to create a custom tag.
Specify a tag group or create a new one if needed. Tag groups allow you to classify all tags into a group that fits within a segmented list of similar categorization functions. Assign a name to each tag value within the chosen tag group.
Step 3: Create a New Group
If you’d like to create a new tag group, you can click the “+" sign beside the “Group” title - this is located within the tag management interface to when you press the “New Tag” button.
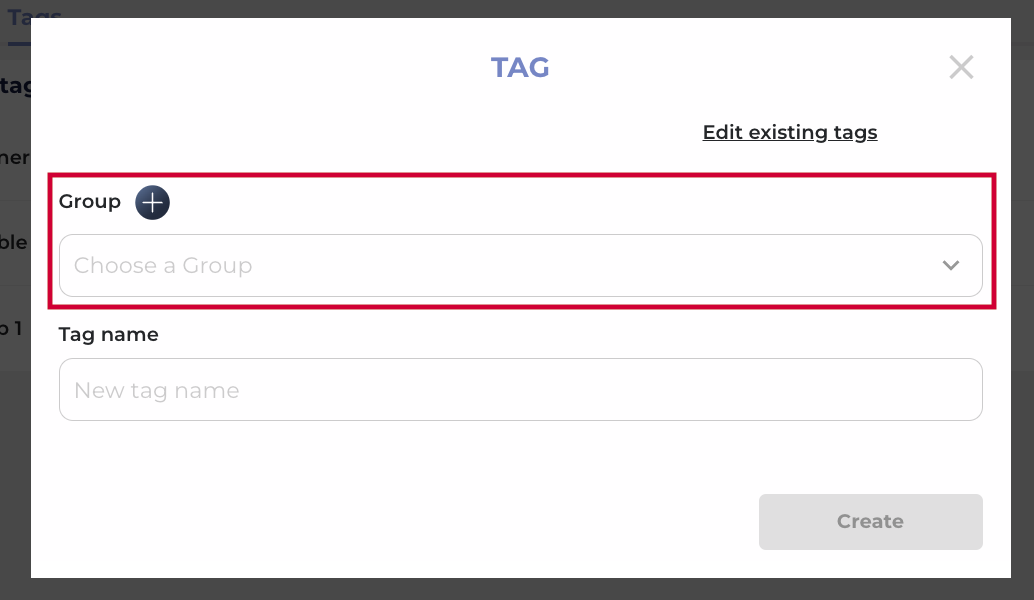
Provide a name for the tag group, such as "Homeowner,” then add individual tag values.
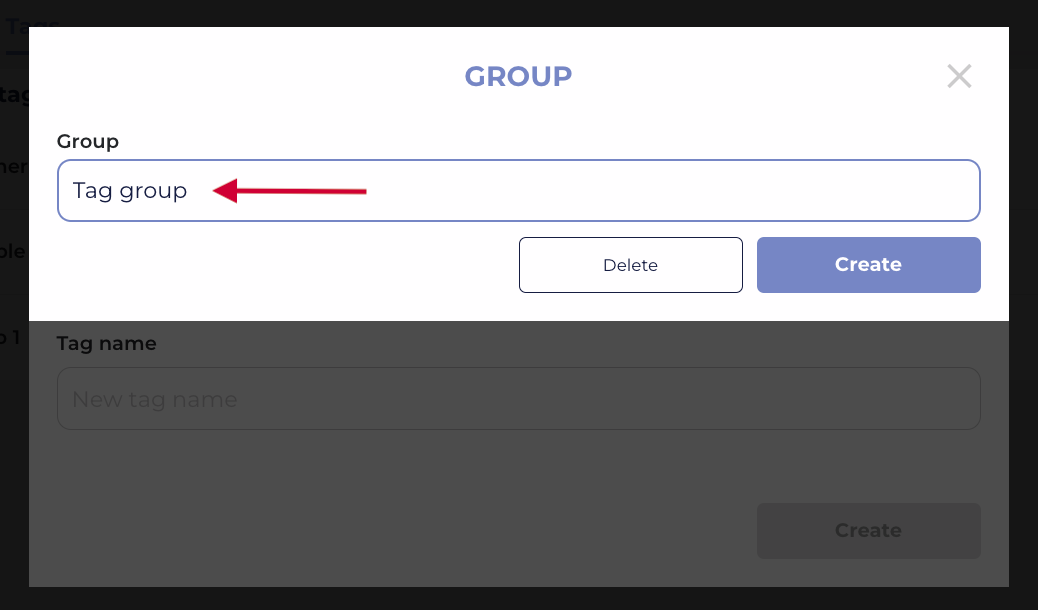
Finally, add individual tag values under the selected group.
.png)
Step 4: Utilize Custom Tags
Once the desired custom tags and tag groups are created, navigate to the transaction section within Clearing’s menu. You can click on the highlighted option to assign tags to transactions.
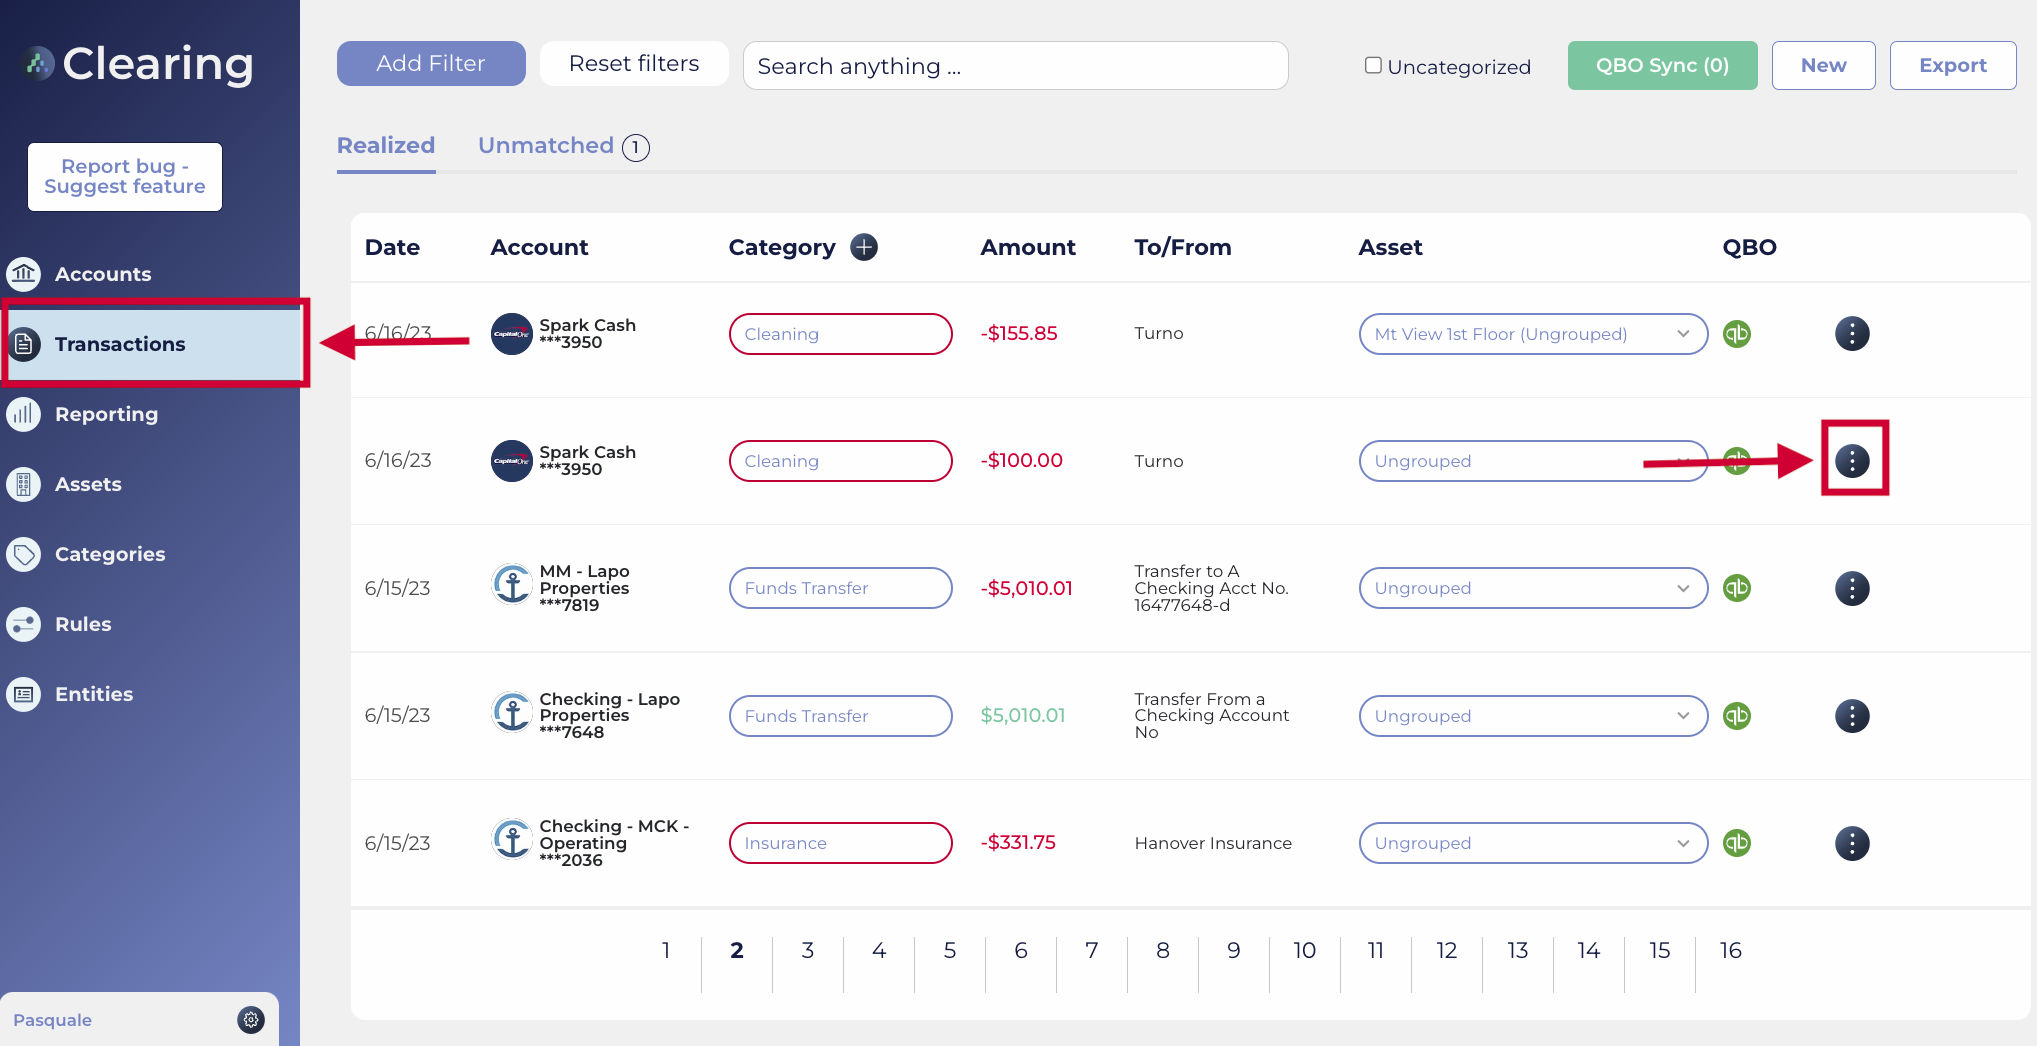
once clicked, you can choose the relevant custom tags from the available list and associate them with the respective transactions.

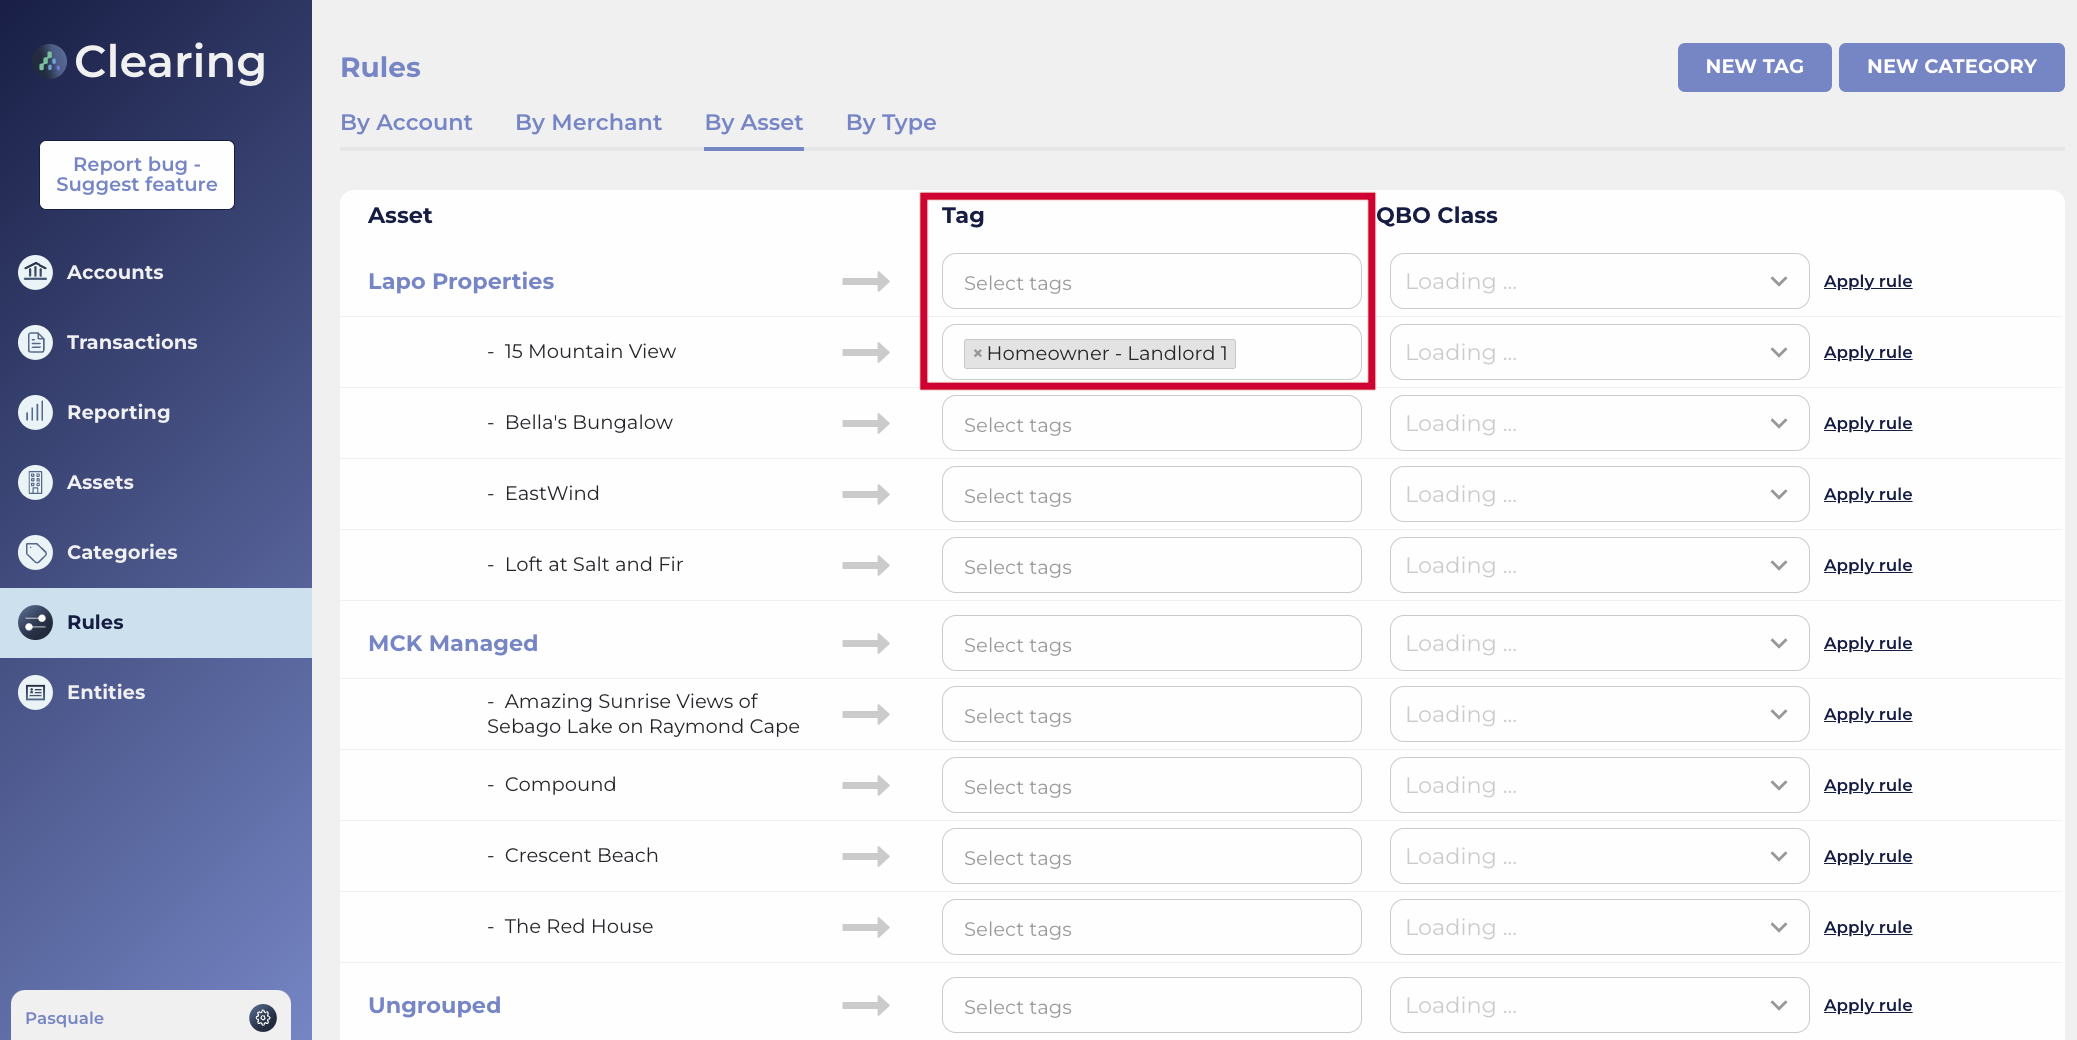
Additionally, you can create rules to automate tagging based on specific criteria. For example, everything in the property below is for Landlord 1. So tag this as transaction “Landlord 1” to get all transactions for the particular asset with this homeowner.
Take advantage of this feature to organize financial data more efficiently by creating customized categorization systems, assigning specific tags to transactions, and more.
Ready to experience the power of Clearing's custom tags and revolutionize your transaction management?
Request a personalized demo today and see how Clearing can transform your property management financial operation.
Further, we invite you to explore our comprehensive knowledge base to enhance your understanding of Clearing's features, and further optimize your property management financial operations.
Clearing is a Financial Technology Company, not a bank.
.png)
.png)
.png)
%20(1).png)
.png)
.png)
.png)
%20(1).png)
%20(1).png)
%20(1).png)


.jpg)
%20(1).png)
%20(1).png)
%20(2).png)
%20(1).png)

%20(1).png)
%20(1).png)
%20(1).png)


%20(1).png)
%20(1).png)
%20(1).png)
%20(1).png)
%20(1).png)


%20(1).png)
%20(1).png)
%20(1).png)
%20(2).png)
%20(2).png)


%20(2).png)


%20(2).png)
%20(1).png)
.png)


%20(2).png)
%20(2).png)

.jpg)
.png)
.png)
.png)


.png)
.png)
%20(1).png)
.png)

.png)

.png)
.png)
.png)
.png)
.png)
.png)


.png)
.png)
.png)
%20(1).png)
%20(1).png)
%20(1).png)
%20(1).png)
%20(1).png)
.png)
.png)
.png)
.png)
%20(1).png)
.png)
.png)
.png)
.png)
%20(1).png)
.png)
